SeaCat Tutorial - Chapter 3: Introduction to REST Integration (iOS)
Foreword
This article continues with practical demonstration of strength and capabilities of SeaCat (Mobile Secure Gateway) in our tutorial series.
In the previous article we created a simple host in Node.js where we were able to handle POST requests sent from a mobile application via SeaCat Gateway to our host.
The goal of this article is to extend the knowledge and develop an iOS application which is able to comunicate with REST interface provided by Node.js that we are going to create as well. A full integration with SeaCat is essential for information security of our example.
There are several points we would like to mention before we begin. The most important one is the switch from Objective-C to Apple new programming language so-called Swift [1], despite the fact the both languages are equally supported nowadays. The reason for this change is that we strongly believe that Swift is the future of iOS development and the sooner we start, the better.
For our convenience the Node.js part is now written in Express.js [2] framework. This lightweight Sinatra-like framework helps us to simplify the work with HTTP requests by wrapping the most common tasks into simple commands and get things done with less effort. For the same reason we decided to use AFNetworking [3] library on iOS side.
This application will be also extended and improved in future parts of this tutorial. We don't want you to be overwhelmed by new languages and frameworks and for this reason we decided to have data stored in-memory for this time. You can play with REST interface without any doubt until you decide to restart the Node.js host. This will change in the next tutorial where we use MongoDB for storing all our data.
Node.js host
The first step in our journey is to prepare Node.js host with REST interface. There are many ways how to do that: It can be written completely from scratch, however it is quite tedious job far out of scope of this article. To accelerate the way how we work with HTTP, we use Express.js. The following code is written in Node.js with Express.js and because of its length, the chunk of codes are split into several parts each with detailed explanation.
Installation of Express.js and Body-Parser libraries
To install both libraries is very straightforward. We assume you have already had Node.js installed and are familiar with concept of NPM modules. The only two things we need to do is run npm install express to install Express.js.

And for BodyParser installation just execute npm install body-parser.

If you want to have these modules available globally, just add -g parameter (npm install -g express and npm install -g body-parser) but for the purpose of this tutorial this step is not necessary.
Script initialisation
Once we have Express.js and Body-Parser in place, we can start writing actual script. The first part is about initialisation.
// Include external modules - Express.js and BodyParser.
var express = require('express');
var bodyParser = require('body-parser');

// Initialise app by using Express framework.
var app = express();

// Use Body Parser (Helps to process incoming requests).
app.use(bodyParser.urlencoded({extended: true}));
app.use(bodyParser.json());

// Set default port 1337 or custom if defined by user externally.
app.set('port', process.env.PORT || 1337);
In-memory objects
It has been already mentioned that we are not going use any persistent storage. All data will be stored in memory of Node.js process at this time. The API we are going to build is about movies. The objects which help us to handle data around that are mentioned below.
// Initialisation of movies array.
var movies = [
    {
        id: 1,
        name: "Forrest Gump",
        director: "Robert Zemeckis",
        release: 1994
    },
    {
        id: 2,
        name: "Donnie Darko",
        director: "Richard Kelly",
        release: 2001
    },
    {
        id: 3,
        name: "Inception",
        director: "Christopher Nolan",
        release: 2010
    }
];

// A simulation of creating new IDs. Basically get the last element and increase the value of an ID.

function getNewId(){
    return movies[movies.length -1].id + 1;
}

// Function findIndexOfElement helps to identify the array index according to specified key/value pair.

function findIndexOfElement(inputArray, key, value){
    for (var i = 0; i < inputArray.length; i++){
        if (inputArray[i][key] === value){
            return i;
        }
    }
return -1;
}
REST API interface
We are going to create interface which is able to work with following:
- GET /api/movies - get a list of all movies stored in memory.
- GET /api/movies/:id - get detail of particular movie using its id.
- POST /api/movies - create a new movie entry.
- PUT /api/movies/:id - update an existing movie entry.
- DELETE /api/movies/:id - delete and existing movie entry.
The code which is able to handle this is covered below.
// GET - list of all records.
app.get('/api/movies', function(request, response){
    response.json(movies.map(function(movie){
        return {
            id: movie.id,
            name: movie.name,
            director: movie.director,
            release: movie.release
        }
    }));
});

// GET - list of a record with particular id. If not found, forward the request to 404 - not found.
app.get('/api/movies/:id', function(request, response, next){
    // Get an integer interpretation of URL parameter.
    var urlIntParam = parseInt(request.params.id);
    // Check whether the element is a valid positive number.
    if (urlIntParam < 0 || isNaN(urlIntParam)){
        // Use following middleware - matched 404.
        next();
    }
    else {
        // Find array index in our movie array based on the input parameter (converted to integer).
        var elementIndex = findIndexOfElement(movies, 'id', urlIntParam);
        // If element exists, get the response, otherwise redirect to 404.
        if (elementIndex >= 0){
            // Get an object from movie array.
            var selectedMovie = movies[elementIndex];
            // Return JSON response with selected attributes.
            response.json({
                id: selectedMovie.id,
                name: selectedMovie.name,
                director: selectedMovie.director,
                release: selectedMovie.release
            });
        }
        else {
            // redirection to 404.
            next();
        }
    }
});

// POST - create a new element.
app.post('/api/movies', function(request, response){
    // complete request body
    var requestBody = request.body;

    movies.push({
        id: getNewId(),
        name: requestBody.name,
        director: requestBody.director,
        release: requestBody.release
    });

    response.status(200).end();
});

// PUT - update existing element.
app.put('/api/movies/:id', function(request, response, next){
    // Get an integer interpretation of URL parameter.
    var urlIntParam = parseInt(request.params.id);
    // Check whether the element is a valid positive number.
    if (urlIntParam < 0 || isNaN(urlIntParam)){
        // Use following middleware - matched 404.
        next();
    }
    else {
        // Find array index in our movie array based on the input parameter (converted to integer).
        var elementIndex = findIndexOfElement(movies, 'id', urlIntParam);
        // If element exists, get the response, otherwise redirect to 404.
        if (elementIndex >= 0){
            // Update element accordingly.
            movies[elementIndex] = {
                id: urlIntParam,
                name: request.body.name,
                director: request.body.director,
                release: request.body.release
            };
            // Element successfuly updated.
            response.status(200).end();
        }
        else {
            // redirection to 404.
            next();
        }
    }
});

// DELETE - remove particular record from array.
app.delete('/api/movies/:id', function(request, response, next){
    // Get an integer interpretation of URL parameter.
    var urlIntParam = parseInt(request.params.id);
    // Check whether the element exists or not. If not (following case, redirect the request to 404).
    if (urlIntParam < 0 || isNaN(urlIntParam)){
        // Use following middleware - matched 404.
        next();
    }
    else {
        // Find array index in our movie array based on the input parameter (converted to integer).
        var elementIndex = findIndexOfElement(movies, 'id', urlIntParam);
        // If element exists, get the response, otherwise redirect to 404.
        if (elementIndex >= 0){
            // Delete element according to index parameter.
            movies.splice(elementIndex, 1);
            // Element successfuly deleted.
            response.status(200).end();
        }
        else {
            // redirection to 404.
            next();
        }
    }
});
The error handling
The last part we are going to add is an error handling. Problems like non-existing resources (404) and server problems (500) are really simple to handle with Express.js and its middleware concept. It's quite complex topic, for now on just keep in mind we have to place following parts at the end of script (after all other routes from above).
// Use Express midleware to handle 404 and 500 error states.
app.use(function(request, response){
    // Set status 404 if none of above routes processed incoming request.
    response.status(404);
    // Generate the output.
    response.send('404 - not found');
});

// 500 error handling. This will be handled in case of any internal issue on the host side.
app.use(function(err, request, response){
    // Set response type to application/json.
    response.type('application/json');
    // Set response status to 500 (error code for internal server error).
    response.status(500);
    // Generate the output - an Internal server error message.
    response.send('500 - internal server error');
});
Finalisation of the host script
The last piece of information we have to add is part for actual listening on the defined port.
// Start listening on defined port, this keep running the application until hit Ctrl + C key combination.

app.listen(app.get('port'), function(){
    console.log("Host is running and listening on http://localhost:" + app.get('port') + '; press Ctrl-C to terminate.');
});
Once all of above is in one file, the script is done and ready to go. Full version of the script is available in GitHub as NodeRESTHost.js.
Running Node.js host
For running our script we have to just type node NodeRESTHost.js. The result should look like following:

SeaCat Gateway configuration
Let's configure the SeaCat Gateway which will handle the secure communication between the client (iOS) and host (Node.js + Express.js).
Download SeaCat trial installation package and unpack the content of that package by typing tar xjvf SeaCat_Trial_OSX_iOS_14.12.tar.bz2 in working directory in terminal.

As the next step you have to modify the file seacat-trial.conf in SeaCat_Trial_OSX_iOS/SeaCatGateway directory. Change the default settings:
[host:test]
uri=http://127.0.0.1/
To the configuration represented by Node.js host settings (our host listens on port 1337).
[host:nodejshost]
uri=http://127.0.0.1:1337
We can also download the updated version of seacat-trial.conf from GitHub.
Once the changes in seacat-trial.conf are saved, we run the SeaCat Gateway by typing ./seacatd-trial in terminal window (the same working directory as seacat-trial.conf). If the output is similar to following:

SeaCat Gateway is configured correctly. Congratulations! We have to keep both Node.js host and SeaCat Gateway running.
iOS Mobile Application (Swift)
Now it's time to develop the iOS mobile application which communicate with SeaCat Gateway. Before we begin, it's important to check whether the system contains the latest Xcode version (everything >= 6.0.0 is fine). If the version is below the 6.0.0, the code examples for Swift won't compile.
Creating empty project and changing the default settings
To start a new project is simple. Just open Xcode and create a new project. From the list of available templates select Single View Application and click on the Next button.

As a product name type RESTClient and make sure Swift is selected as language option. What you fill into other text fields is completely up to you. We still run our examples in Simulator and from this perspective other settings here really don't matter.

Once you click on the Next button and save the project on the disk, you will see following screen.

Before we start with development, we have to change some of the default settings. We need to: Hide status bar and Change the launch screen to Main.storyboard. Make sure the settings look like in the picture below.

Another step is to get rid of default LaunchScreen.xib file. Just make a right-click on the file and select Delete from the available options.

Once the confirmation screen will appear, click on Move to Trash button and ged rid of this default screen.

Another step is to click on Main.storyboard (1), Show document outline (2) if hidden, select View Controller (3), show The file inspector (4) and uncheck Use Size Classes (5).

Once we do that, we have to confirm our intention by clicking on Disable Size Classes. This help us to establish the correct settings in automatic layout.

Including SeaCat.framework and AFNetworking
To include Objective-C libraries is a bit different with the new version of Xcode and Swift environment. The key thing is to include special ProjectName-Bridging-Header.h which help us to connect these two worlds.
In this application we are going to incorporate following frameworks:
- AFNetworking
- SeaCat
Open the particular folders and move the files into our Xcode workspace. In case of AFNetworking there are several folders. For the purpose of our development we are interested in AFNetworking one (not UIKit+AFNetworking). Take this folder and drag it into workspace.

Once we release mouse button, another dialog will appear. We have to make sure the option Copy items if needed is checked.

By clicking on the Finish button, AFNetworking is added in the project structure.

The situation with the SeaCat libraries is similar. The only difference is that we are adding a framework at this time. Open the folder with the client and drag the framework file in project structure.

Release the mouse button and make sure the destination Copy items if needed is checked.

Once we click on Finish button, SeaCat library will be added in the project like is shown in following picture.

The last step we have to do in this section is to create RESTClient-Bridging-Header.h file and include header files for both libraries. In the project group make a double-click and select a New File option.

Selection of Header File is our choice in following screen. Confirm it by clicking on the Next button.

Before you finally save the file, make sure the name is written as RESTClient-Bridging-Header and RESTClient checkbox is checked.

Click on the Create button and the result will appear immediately.

The empty RESTClient-Bridging-Header file looks like:
#ifndef RESTClient_RESTClient_Bridging_Header_h
#define RESTClient_RESTClient_Bridging_Header_h


#endif
We have to update the file like:
#ifndef RESTClient_RESTClient_Bridging_Header_h
#define RESTClient_RESTClient_Bridging_Header_h

#import <SeaCatClientTrial/SeaCat.h>
#import "AFNetworking.h"

#endif
The last step in the configuration is to customise compiler settings. Basically what we have to do is to find Objective-C Bridging Header settings under Swift Compiler - Code Generation section. Click on the RESTClient group (1), select Build settings (2), extend the view to All (3) and find Objective-C Bridging Header option.

Edit settings and add our header file as RESTClient-Bridging-Header.

Now we are all set and we can start with the development itself. Quick compilation of the project by typing CMD + B helps to ensure that all libraries were added correctly. In case of any failure please check previous steps with your current settings.
Adding components to storyboard
Now it's time to add some actual components to storyboard. Let's start with the Labels. From the Object library find UILabel and place it to View Controller object.

In the attribute inspector change the title to id: and confirm it.

From the Object library find another UILabel and place it to View Controller object again.

In the attribute inspector change the title to name: and confirm it.

From the Object library find another UILabel and place it to View Controller object again.

In the attribute inspector change the title to director: and confirm it.

From the Object library find another UILabel and place it to View Controller object again.

In the attribute inspector change the title to release: and confirm it.

From the Object library find another UILabel and place it to View Controller object again.

In the attribute inspector change the title to response: and confirm it.

Not it's time to focus on UITextField objects. From the Object library choose one and place it to View Controller object.

From the Object library select the second one and place it to View Controller object again.

From the Object library select the third one and place it to View Controller object again.

From the Object library select the fourth one and place it to View Controller object again.

From the Object library select the fifth (last) one and place it to View Controller object again.

Before any further development, we should make better alignment of our components.

Our result should look like the picture below.

Select the first Text Field and focus on Font and Placeholder text.

Set the font size to 12 and Placeholder text to specify numeric ID.

Select the second Text Field and focus on Font and Placeholder text again.

Set the font size to 12 and Placeholder text to specify a movie name.

Select the third Text Field and focus on Font and Placeholder text again.

Set the font size to 12 and Placeholder text to specify a movie director.

Select the fourth Text Field and focus on Font and Placeholder text again.

Set the font size to 12 and Placeholder text to specify a year of release.

Select the fifth Text Field and focus on Font and Enabled checkbox.

Set the font size to 12 and uncheck Enabled option.

To make the UX more interactive, select UISegmentedControl from Object library and place it to View Controller object.

There are 2 parts to focus on. Segments and Segment Title.

Change Segments number to 4 and title to GET.

Select the second segment from the list.

Change the default title to POST.

Select the third segment from the list.

Change the default title to PUT.

Select the fourth segment from the list.

Change the default title to DELETE and make the size a little bit wider.

From the Object library select the UIButton and place it to View Controller object.

Change the title to Send Request.

The view should look like following:

Select every object (command key + a).

Once objects selected, go to Editor -> Embed in and click on View.

This will collect every object into 1 group which helps with the layout settings.

Click on Pin button and add width and height constraints as following.

Click on align button and add two more constraints - horizontal and vertical center in container.

Click on View Controller and in Simulated Metrics in Attribute Inspector set the status bar to None.

The final layout result will look like following:

Connect objects in storyboard with code in ViewController.swift
The part we are going to focus on right now is the connection between Main.storyboard and ViewController.swift. Open the ViewController.swift.

And add following code:
@IBOutlet weak var idTextField: UITextField!
@IBOutlet weak var nameTextField: UITextField!
@IBOutlet weak var directorTextField: UITextField!
@IBOutlet weak var releaseTextField: UITextField!
@IBOutlet weak var verbInSegmentedControl: UISegmentedControl!
@IBOutlet weak var responseTextField: UITextField!
We can see the small empty circles. This is indicator of a need for connection.

Click on yellow icon (View Controller specific one), push control button and drag the mouse into id text field.

From the submenu select idTextField.

Click on yellow icon (View Controller specific one), push control button and drag the mouse into name text field.

From the submenu select nameTextField.

Click on yellow icon (View Controller specific one), push control button and drag the mouse into director text field.

From the submenu select directorTextField.

Click on yellow icon (View Controller specific one), push control button and drag the mouse into release text field.

From the submenu select releaseTextField.

Click on yellow icon (View Controller specific one), push control button and drag the mouse into connecting response text field.

From the submenu select responseTextField.

Click on yellow icon (View Controller specific one), push control button and drag the mouse into connecting segmented control.

From the submenu select verbInSegmentedControl.

After all important objects are connected, we will see the circles filled.

Finishing the application
We need to complete our application by adding some code. Let's start with creating an instance of AFHTTPRequestOperationManager class.
import UIKit

class ViewController: UIViewController {
    let manager = AFHTTPRequestOperationManager()
    .
    .
    .
Another step is to update viewDidLoad() by adding some method calls (we haven't added these methods yet).
override func viewDidLoad() {
    super.viewDidLoad()
    // Do any additional setup after loading the view, typically from a nib.
    // Manage Accesibility for UITextFields just after the initialisation.
    manageAccessibilityForUITextFields(verbInSegmentedControl.selectedSegmentIndex)
    dataCleaningForUITextFields()
}
We are also going to add our own method manageAccessibilityForUITextFields(verb: Int). This will help us to lock/unlock our UITextField elements based on selected HTTP method (GET/PUT/POST/DELETE).
func manageAccessibilityForUITextFields(verb: Int) {
    switch verb {
        // We are going to handle UITextFields based on GET (index 0).
    case 0:
        idTextField.enabled = true
        nameTextField.enabled = false
        directorTextField.enabled = false
        releaseTextField.enabled = false
        // We are going to handle UITextFields based on POST (index 1).
    case 1:
        idTextField.enabled = false
        nameTextField.enabled = true
        directorTextField.enabled = true
        releaseTextField.enabled = true
    case 2:
        // We are going to handle UITextFields based on PUT (index 2).
        idTextField.enabled = true
        nameTextField.enabled = true
        directorTextField.enabled = true
        releaseTextField.enabled = true
        // We are going to handle UITextFields based on DELETE (index 3).
    case 3:
        idTextField.enabled = true
        nameTextField.enabled = false
        directorTextField.enabled = false
        releaseTextField.enabled = false
        // Enabled all fields in Default.
    default:
        idTextField.enabled = true
        nameTextField.enabled = true
        directorTextField.enabled = true
        releaseTextField.enabled = true
    }
}
Another method helps us to clean UITextFields once any action is done.
func dataCleaningForUITextFields() {
    // Clean all fields in every situation.

    idTextField.text = String()
    nameTextField.text = String()
    directorTextField.text = String()
    releaseTextField.text = String()
    responseTextField.text = String()
}
Method populateTextFields(responseObject: AnyObject!) reads the response and populate the text fields with the content.
func populateTextFields(responseObject: AnyObject!) {
    let jsonResult = responseObject as Dictionary<String, AnyObject>
    nameTextField.text = String(jsonResult["name"] as AnyObject! as String)
    directorTextField.text = String(jsonResult["director"] as AnyObject! as String)
    releaseTextField.text = String(jsonResult["release"] as AnyObject! as Int)
}
We call func displaySuccessMessage(message: String) and func displayErrorMessage(message: String) methods basically whenever we need to send some message to response text field.
func displaySuccessMessage(message: String) {
    self.responseTextField.textColor = UIColor.darkGrayColor()
    self.responseTextField.text = message
}

func displayErrorMessage(message: String) {
    self.responseTextField.textColor = UIColor.redColor()
    self.responseTextField.text = message
}
Method getRequest() basically process a GET request. Read defined ENDPOINT based on specified parameter.
func getRequest() {
    var id: String = idTextField.text
    if countElements(id) == 0 {
        displayErrorMessage("ID element is empty")
    }
    else
    {
        manager.GET("https://nodejshost.seacat/api/movies/\(id)",
            parameters: nil,
            success: {(operation: AFHTTPRequestOperation!, responseObject: AnyObject!) in
                let message = "Data received successfully!"
                self.populateTextFields(responseObject)
                self.displaySuccessMessage(message)
            },
            failure: {(operation: AFHTTPRequestOperation!, error: NSError!) in
                self.dataCleaningForUITextFields()
                let message = error.localizedDescription
                self.responseTextField.textColor = UIColor.redColor()
                self.responseTextField.text = message
        })
    }
}
Method postRequest() basically do a POST request. Send data to defined ENDPOINT.
func postRequest() {
    var name = nameTextField.text
    var director = directorTextField.text
    var release = releaseTextField.text
    var parameters = ["name": name, "director": director, "release": release]

    manager.POST("https://nodejshost.seacat/api/movies",
        parameters: parameters,
        success: {(operation: AFHTTPRequestOperation!, responseObject: AnyObject!) in
            let message = "Data successfully sent!"
            self.displaySuccessMessage(message)
        },
        failure: {(operation: AFHTTPRequestOperation!, error: NSError!) in
            self.dataCleaningForUITextFields()
            let message = error.localizedDescription
            self.responseTextField.textColor = UIColor.redColor()
            self.responseTextField.text = message
    })
}
Method putRequest() basically do a PUT request. Send updated data to defined ENDPOINT based on specified id element.
func putRequest() {
    var id = idTextField.text
    var name = nameTextField.text
    var director = directorTextField.text
    var release = releaseTextField.text
    var parameters = ["name": name, "director": director, "release": release]

    if countElements(id) == 0 {
        displayErrorMessage("ID element is empty")
    }
    else {
        manager.PUT("https://nodejshost.seacat/api/movies/\(id)",
            parameters: parameters,
            success: {(operation: AFHTTPRequestOperation!, responseObject: AnyObject!) in
                let message = "Data successfully sent!"
                self.displaySuccessMessage(message)
            },
            failure: {(operation: AFHTTPRequestOperation!, error: NSError!) in
                self.dataCleaningForUITextFields()
                let message = error.localizedDescription
                self.responseTextField.textColor = UIColor.redColor()
                self.responseTextField.text = message
        })
    }
}
Method deleteRequest() basically do a DELETE request. Delete data in defined ENDPOINT based on specified id element.
func deleteRequest() {
    var id = idTextField.text
    if countElements(id) == 0 {
        displayErrorMessage("ID element is empty")
    }
    else {
        manager.DELETE("https://nodejshost.seacat/api/movies/\(id)",
            parameters: nil,
            success: {(operation: AFHTTPRequestOperation!, responseObject: AnyObject!) in
                let message = "Object successfully deleted!"
                self.displaySuccessMessage(message)
            },
            failure: {(operation: AFHTTPRequestOperation!, error: NSError!) in
                self.dataCleaningForUITextFields()
                let message = error.localizedDescription
                self.responseTextField.textColor = UIColor.redColor()
                self.responseTextField.text = message
        })
    }
}
There are two more methods we need to implement. Adding these methods help us to manage the actions and we can simply check the state of segmented control or button.
@IBAction func selectVerbInSegmentedControl(sender: AnyObject) {
    manageAccessibilityForUITextFields(sender.selectedSegmentIndex)
    dataCleaningForUITextFields()
}

@IBAction func sendRequest(sender: AnyObject) {
    switch (verbInSegmentedControl.selectedSegmentIndex)
    {
        case 0:
            self.getRequest()
        case 1:
            self.postRequest()
        case 2:
            self.putRequest()
        case 3:
            self.deleteRequest()
        default:
            println("Undefined request")
    }
}
We have to return back to Main.storyboard and click on the UISegmentedControl. Then Push control key and drag mouse into View Controller icon.

From the context menu we have to choose selectVerbInSegmentedControl: option.

One of the last thing is clicking on the UIButton Send Request. Then we have to push control key and drag mouse into View Controller icon again.

From the context menu we have to choose sendRequest: option.

Open AppDelegate.swift in Xcode and focus on following method:
func application(application: UIApplication, didFinishLaunchingWithOptions launchOptions: [NSObject: AnyObject]?) -> Bool {
    // Override point for customization after application launch.

    return true
}
Update it as following
func application(application: UIApplication, didFinishLaunchingWithOptions launchOptions: [NSObject: AnyObject]?) -> Bool {
    // Override point for customization after application launch.
    SeaCatClient.configure()

    return true
}
Running the application
We are done from the implementation point of view. Now it's time to play with our application. After run in the simulator we can see following result:

Once we specify a certain id, we will get desired result.

We can try to delete an element with certain id as well.

If we try to select that deleted record, the element won't be available any more.

And so on! Pretty cool, isn't it? You can download the whole application from GitHub.
Conclusion
We basically built a really simple application using a REST interface. There is still some missing pieces like advance error handling. In following tutorials we will improve the application step by step and get more advance features. Enjoy!
Reference:
- https://developer.apple.com/swift
- http://expressjs.com
- http://afnetworking.com
SeaCat iOS tutorials in this series:

Most Recent Articles
You Might Be Interested in Reading These Articles
Don't worry, ASAB and the universe can be fixed
How do my first sprints in TeskaLabs look like? Sheer desperation quickly turns into feelings of illumination and euphoria. And back. I've also made a few new friends and learned a thing or two about flushing metrics. The digital adventure begins.
Published on February 15, 2022
SeaCat tutorial - Chapter 2: Simple Post (iOS)
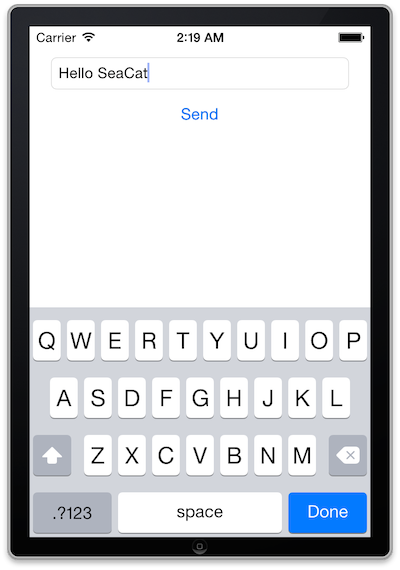
The goal of this article is to create a simple iOS client which generates a simple POST Request which will be read in host written in Node.js and the output generated in the console. The whole comunication will be handled by SeaCat which help us to establish fast and secure connection among our key components.
Published on September 09, 2014

Engaged with ASAB
About microservices, coroutines, failures and enthusiasm. And most of all, about ASAB. ASAB is the first thing that probably every newcomer to TeskaLabs gets fond of.
Published on June 15, 2022